
Kitchen Pantry Cabinet Depth and Shelf Spacing
Hidden food leads to repeat purchases. Plan kitchen pantry cabinet depth and shelf spacing around usable openings, container height and retrieval space.
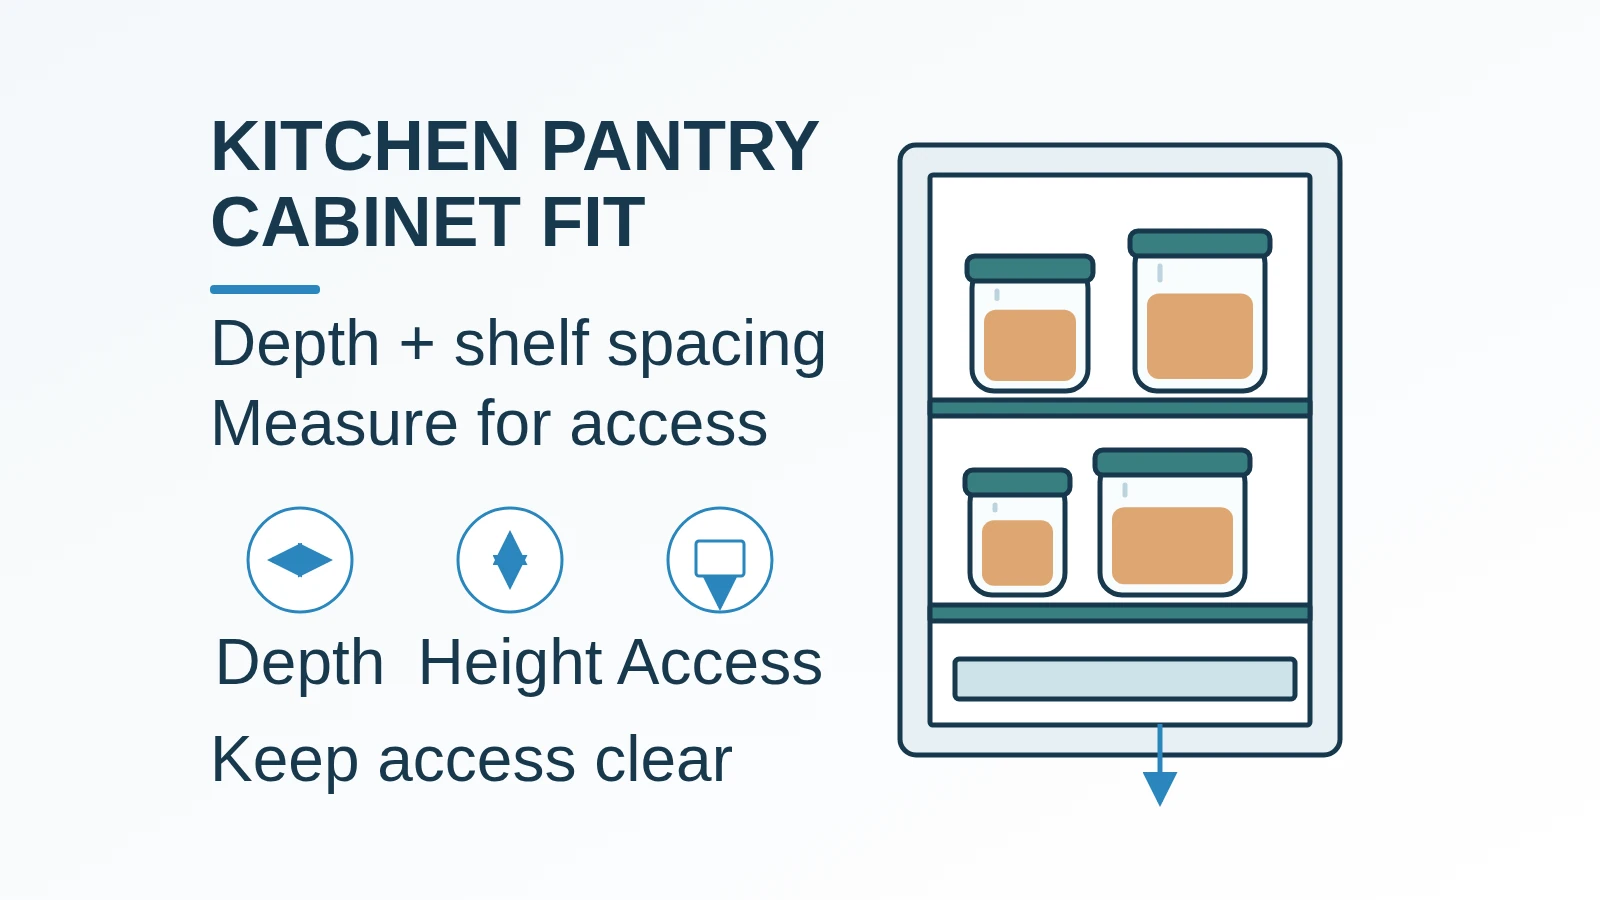
Hidden food leads to repeat purchases and ingredients left unused. Set kitchen pantry cabinet depth and shelf spacing from the usable opening, the tallest stored package and the space needed to remove it.
A kitchen pantry cabinet works when every regular item can pass through the door, stand under the shelf above and come out without unloading its neighbors. Choose depth for access as well as capacity, then set shelf spacing by container height plus measured retrieval clearance. A catalog depth is a starting point for a particular cabinet system; it does not establish the shelf space available behind hinges, doors or pull-out hardware.
Which dimensions should you record first?
Record the usable interior and the door opening separately before choosing jars, bins or replacement shelves. Measure with the doors in their normal open position and include protruding hinges and handles.
Scroll horizontally to see all columns.
| Input or item | Typical value or source | Why it matters |
|---|---|---|
| Catalog high-cabinet depth | IKEA’s July 2023 SEKTION guide lists 24 in or 14¾ in | Examples from one system; neither number is a guaranteed usable shelf depth |
| Clear shelf depth | Measure from the back obstruction to the closed-door obstruction | Determines whether the bin fits with the door shut |
| Clear opening width | Measure the narrowest passage with the door open | A shelf can be wider than the opening through which a tray must pass |
| Vertical opening | Measure from the shelf surface to the underside above | Determines whether a lidded container can stand and be removed |
| Shelf or runner load limit | Instructions for the exact shelf, supports and runners | A dimension alone cannot establish a safe load |
The catalog figures above come from the IKEA US SEKTION buying guide, retrieved October 19, 2026. They describe that published system, not a current availability promise or a kitchen-wide standard.
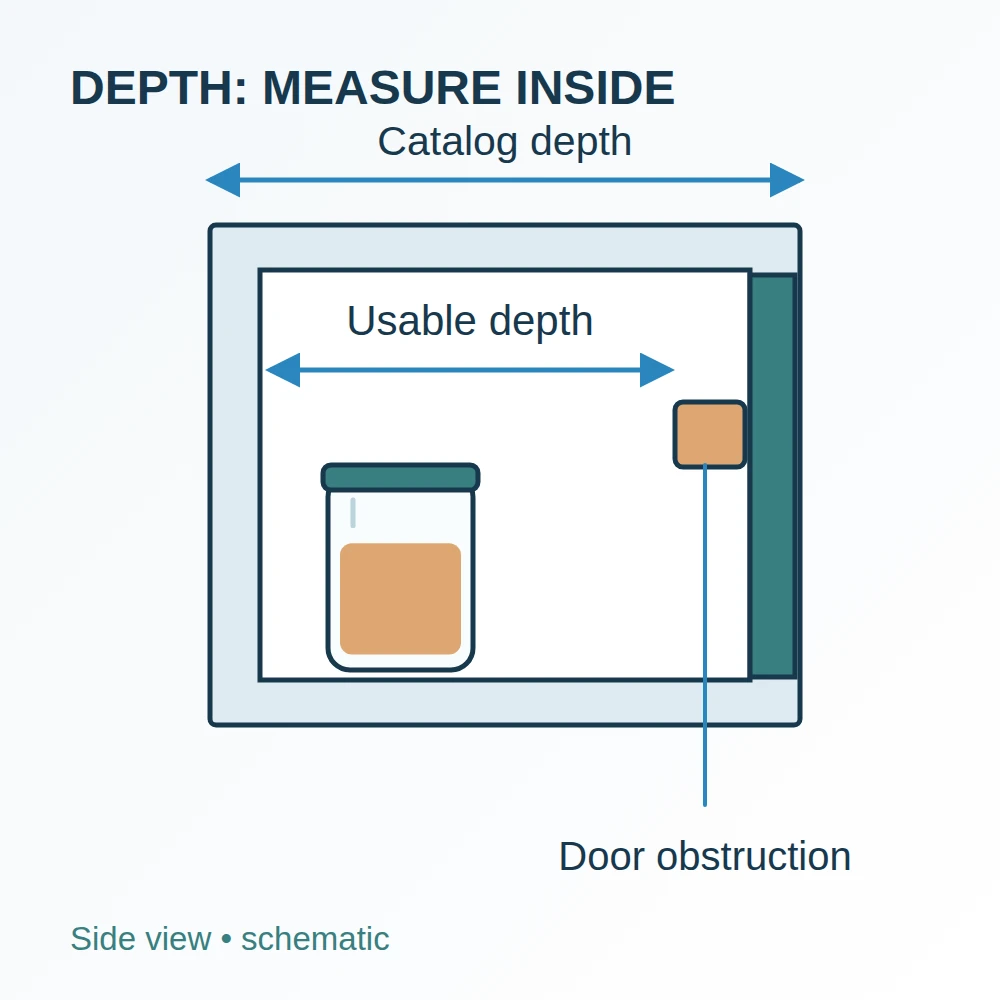
For a new cabinet, also mark its footprint and the door or drawer movement on the floor. Open neighboring appliance doors and check the intended route through the kitchen. Use the cabinet maker’s installation instructions for anchoring and hardware; a successful container fit does not verify installation safety.
How much shelf spacing does a container need?
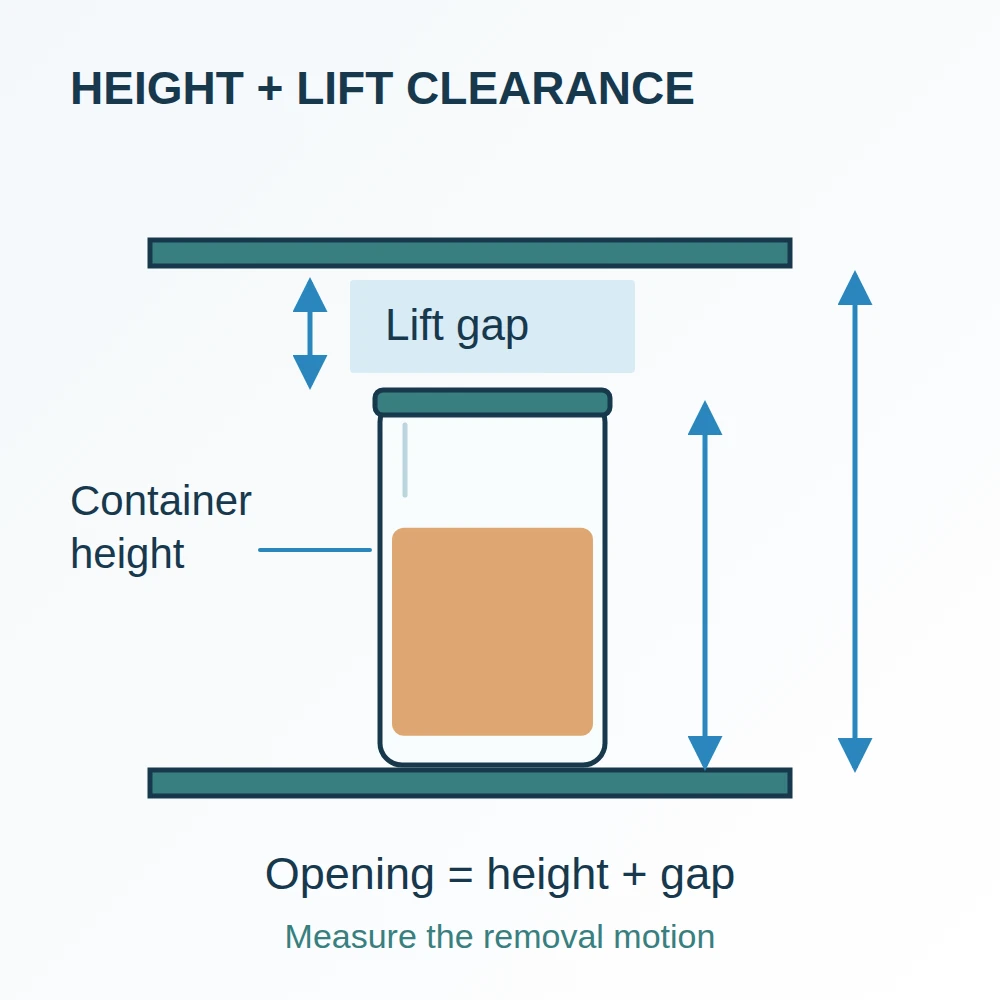
Allow the closed container’s full height plus the clearance needed for your actual removal motion. Include the lid, a projecting clip and any tray beneath it. Try the tallest package rather than estimating from a nominal jar capacity.
Physical threshold rule: If clear opening height minus closed-container height is less than the clearance your removal motion needs, the shelf fails the access check. Raise the adjustable shelf or choose a shorter container. Zero spare height is a failed fit whenever removal requires lifting.
Use this explicit formula, with all lengths in the same unit:
Required clear opening = closed-container height + retrieval clearance.
Worked example, hypothetical measurements: 280 mm container height + 40 mm chosen lift clearance = 320 mm required clear opening.
Here, 40 mm is an assumed clearance for that household’s trial, not a prescribed shelf gap. Repeat the lift with the actual container and regular user, then choose an available shelf position that meets or exceeds the resulting opening. If planning from shelf-top to shelf-top, also account for the thickness of the shelf above; that spacing is different from the clear opening.
Group similar heights together if that lets you add a useful shelf without obstructing access. Keep a different opening for tall bottles instead of giving every shelf the tallest bottle’s spacing. Where a shelf is fixed, change the contents assigned to it rather than modifying structural parts without the manufacturer’s instructions.
Fixed shelves, removable bins or pull-outs?
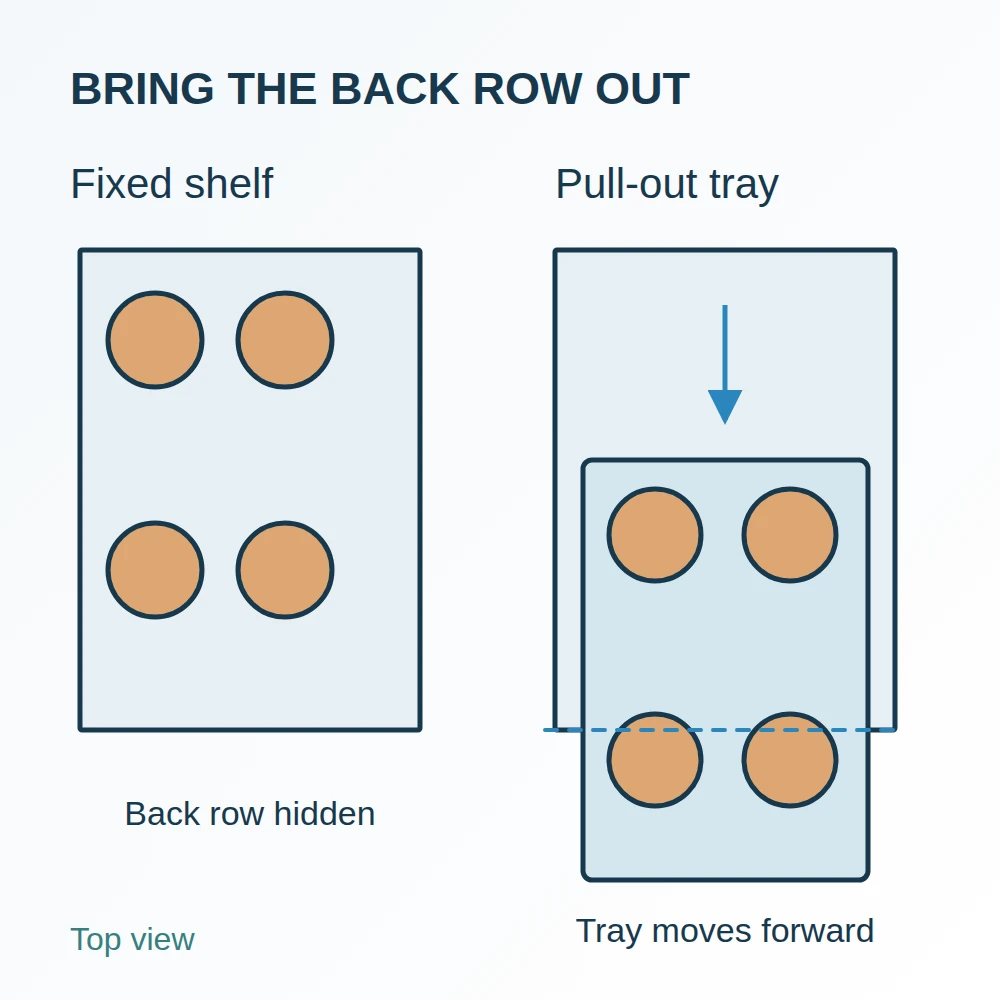
Choose the simplest arrangement that makes the back stock accessible. A deep fixed shelf suits contents you can see and retrieve; a pull-out changes how the back row reaches you but consumes interior space and introduces runner requirements.
Swipe the table sideways on a narrow screen.
Scroll horizontally to see all columns.
| Arrangement | Check before choosing | Dominant Failure Mode & Prevention |
|---|---|---|
| Fixed shelves, one visible row | Package footprint and readable labels | Food hidden behind a front row → group reserves separately and check them before shopping |
| Fixed shelves with removable bins | Loaded bin passes the hinge opening and can be lifted comfortably | Bin fits the shelf but catches the door hardware → trial the full removal path before filling |
| Pull-out shelves or drawers | Runner clearance, door opening and rated loaded weight | Tray collides with a hinge or exceeds its runner rating → follow the exact hardware dimensions and load instructions |
| Adjustable shelves | Available support positions and required clear openings | Container stands upright but cannot be lifted out → test retrieval, not just static fit |
Do not assign a generic shelf-load number. Glass jars, cans and large bags change the loaded weight, while shelf span, supports and runners change what the assembly can carry. Find the rating for the exact assembly and count the tray and containers as part of its load.
Does the arrangement save time or simply hold more?
Judge it by a short routine: check reserves, retrieve the current package and put it back. More storage has little value if you must empty the shelf to see what you own.
For a hypothetical household, removing three minutes of searching on each of four cooking days saves 3 minutes × 4 = 12 minutes per week. That is an arithmetic example, not a measured saving. Time your own routine before buying hardware and compare it after rearranging a single shelf.
Track duplicate purchases and food discarded from hidden reserves separately from time. The pantry organization guide explains visible stock groups and a before-shopping reserve check. Keep original package storage directions with decanted food; a more convenient shelf does not change those directions.
Final fit check and sources
Before filling the cabinet, close the door with the intended bin inside, retrieve the tallest container and inspect the back row from the regular user’s position. Confirm the shelf and hardware ratings from the exact manufacturer’s instructions. These checks answer three different questions: does it fit, can you use it, and can the assembly support it?
The dimension examples are from IKEA’s July 2023 US buying guide, retrieved October 19, 2026. The clearance formula is geometry; its worked measurements and time example are hypothetical. Return to the food-storage hub for storage-location and food-specific guidance.
Last updated: October 19, 2026.
Explore more in Food Storage & Freezer Guides.
Official guidance and sources
Sources last checked October 19, 2026.
- SEKTION Kitchen Buying Guide, July 2023 , IKEA US (accessed October 19, 2026) Planning section lists high-cabinet depths of 24 inches or 14¾ inches; these are system examples, not universal usable shelf dimensions.